

Hello and welcome to our Stamping with Friends Blog Hop. We are a group of demonstrators worldwide, sharing our passion for Stampin’ Up! We post twice a month on the first and third Saturday of the month. Each month a theme, technique, card, color, sketch and more is assigned. If you are new here, “Welcome.” If you are a subscriber, “Welcome back.” We know you will enjoy seeing our beautiful creations.
Today’s hop is Masking Technique. There are many ways to create and use a mask for creating.
Masks have two main purposes.
The 2 purposes of a mask:
1. To apply an art medium TO a specific area.
2. To prevent an art medium FROM being applied to a specific area.
What is an art medium? It is the kind of material you are using or playing with. Examples of art mediums are:
- ink
- paint
- spray or mist
- modeling paste
- glue (to add mica flakes, pearl beads, microbeads, confetti, glitter, etc!)
- gesso
The 2 Kinds of masks:
- Masks you buy. You can purchase pre-made masks or templates. A great thing about a mask you purchase is that it is easy to wash it up and use it over and over again.
- Masks you make or find. Use a die-cut machine or punch to cut shapes out of paper or plastic. You can also use a ‘found object’ like a bottle cap or jar lid as a mask.
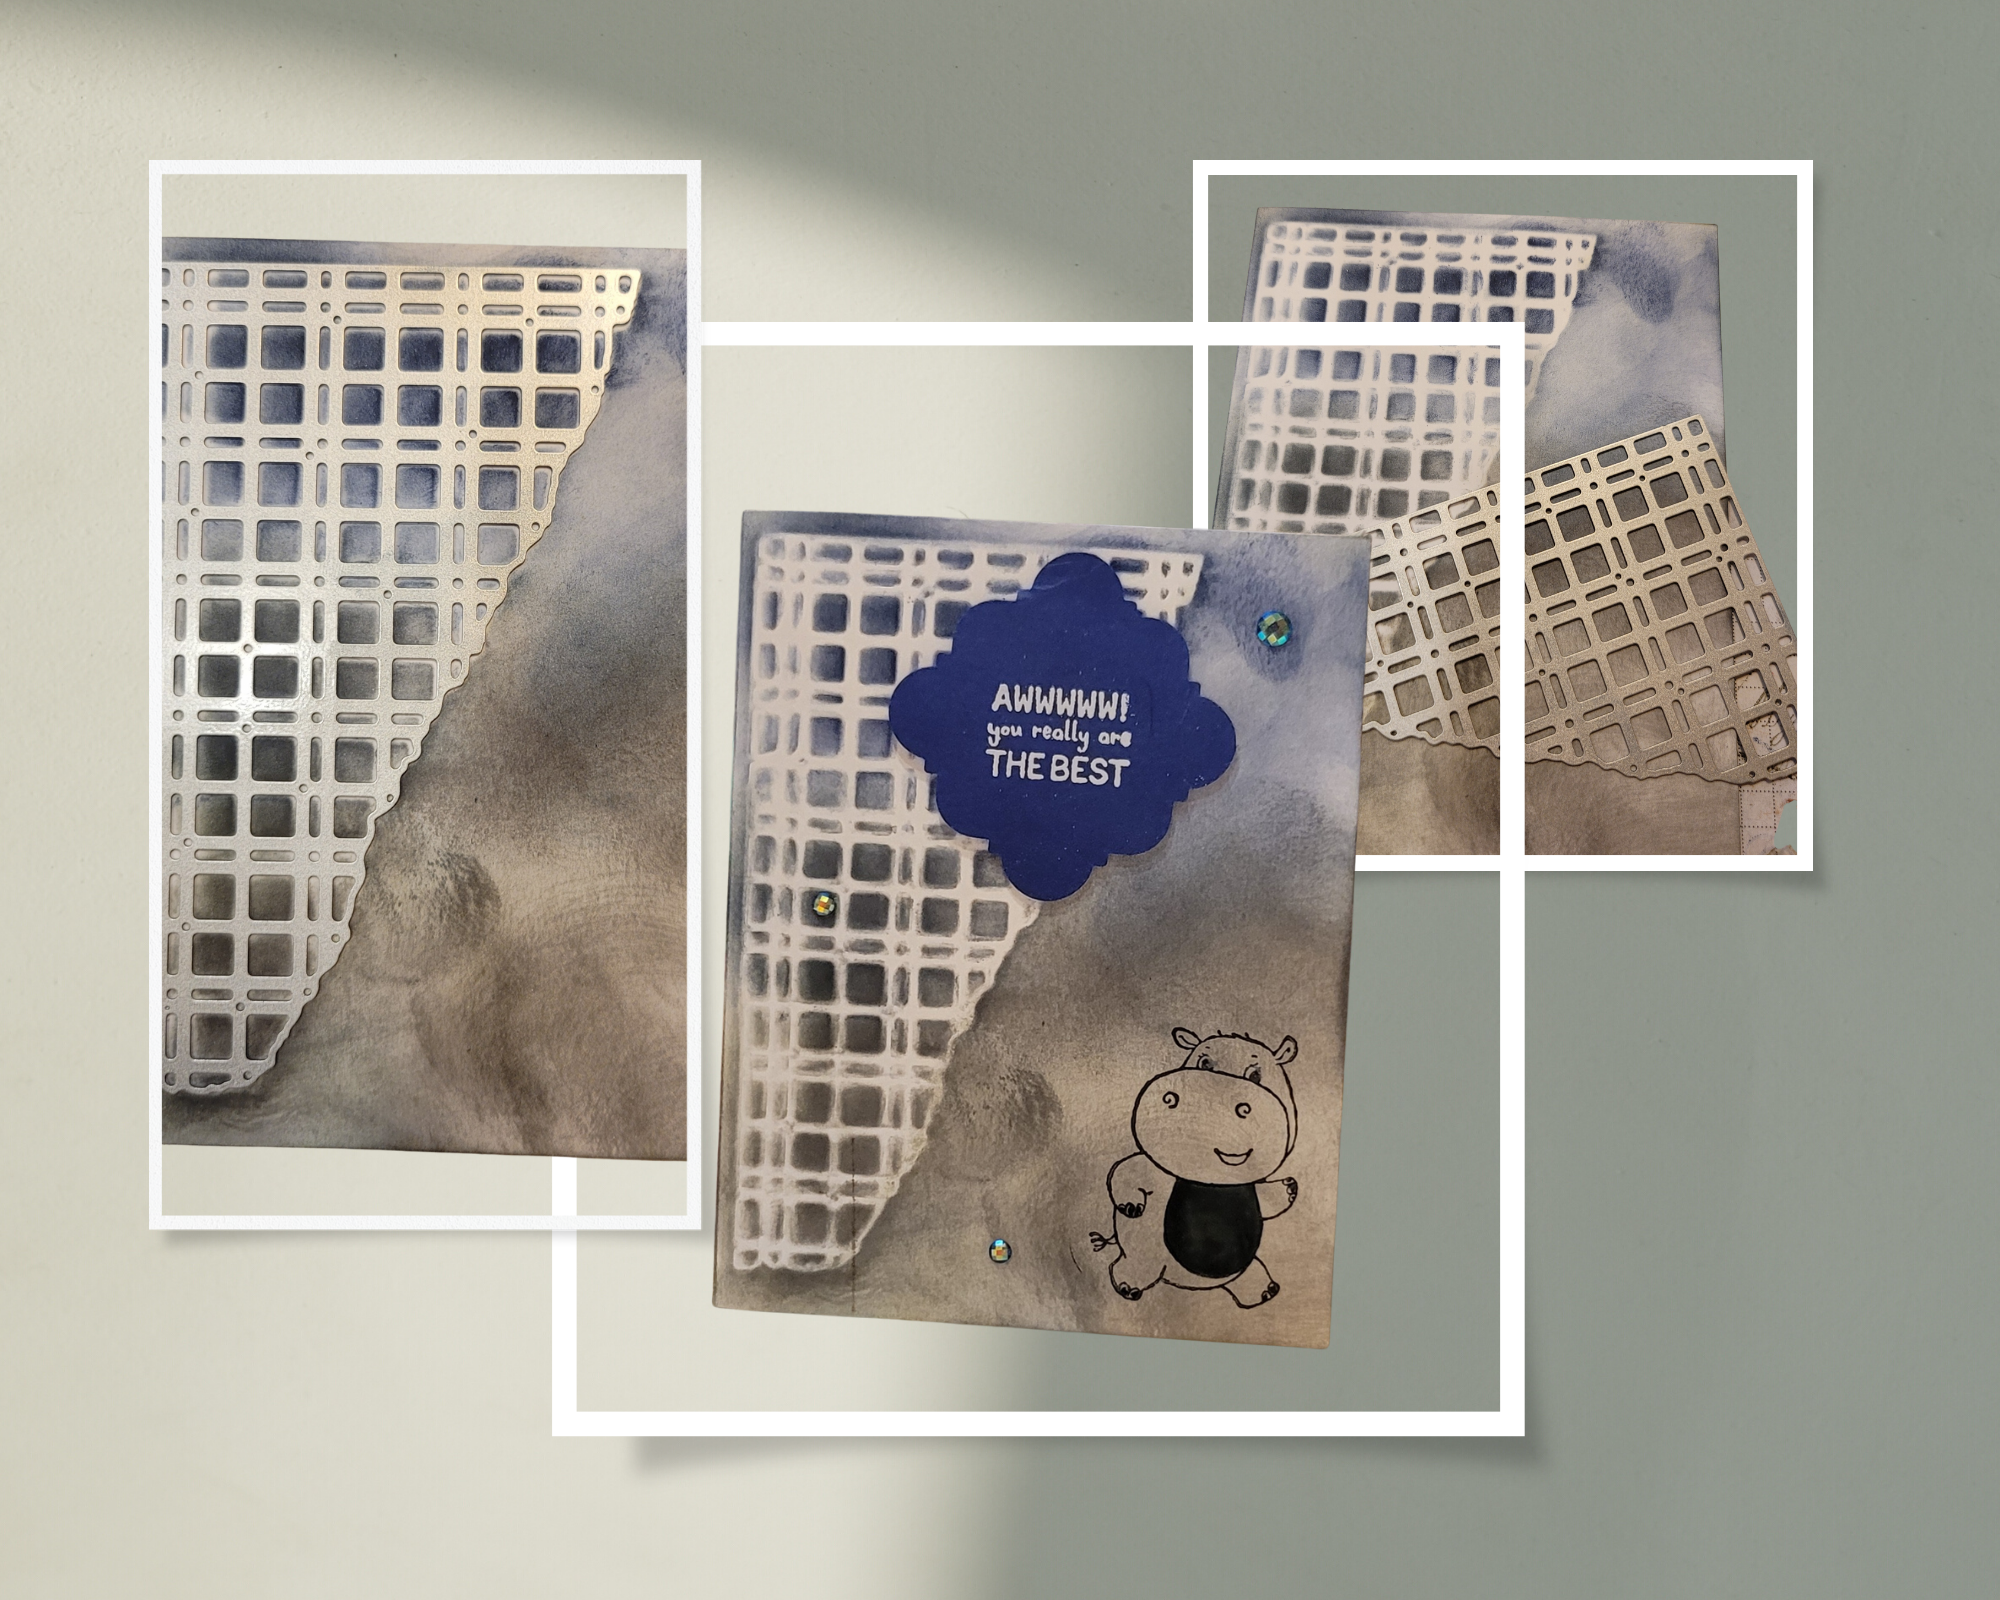
I chose a die to create my mask. I used one of the Split Card Texture Dies.
- I cut my Basic White card base to 8 1/2″ x 5 1/2″ and scored it at 4 1/4.”
- I then laid my die on top of the card base and using the blending brush, I applied Night of Navy across the top.
- In the second layer, I used Basic Gray, applied, and blended it into the Night of Navy.
- In my final layer, I used Smoky Slate, applied, and blended it into the Basic Gray.
- I then stamped my hippo from Hippest Hippos (a sale-a-bration freebie with a $50.00 order) in Stazon Black in the bottom right corner. Using a Basic Black Marker I colored in his belly, eyes, and toenails.
- I punched out a tag from the Handmade Tag punch in Starry Sky cardstock. Stamped “AWWWW! you really are the best” in versamark and applied white embossing powder and heat set it.
- Added it to the top with dimensionals and a few blue adhesive-backed gems to finish off.

Now let’s hop on over to Mickey Moore’s blog and see what masking technique she used.


Suppose you live in the U.S. and do not have a Stampin’ Up! Demonstrator, please contact me. Will be happy to help you with your creative projects. You can visit my Online Store to place your order and have it shipped to your home.

Follow me on my other social media accounts by scanning the QR code below.


Download the Catalog


Hugs,
Donna Schnees
Stampin’ Up! Independent Demonstrator
Cupcakes & Lattes Stampers